Skyrim:Brinewater Grotto
|
|||
|---|---|---|---|
| # of Zones | 1 | ||
| Clearable | No | ||
| Respawn Time | 10 days | ||
| Level | Min: 6 | ||
| Occupants | |||
| Horkers, Frostbite Spiders, Dog, Bandits (see notes) | |||
| Console Location Code(s) | |||
| BrinewaterGrottoExterior, BrinewaterGrottoStart | |||
| Region | |||
| Haafingar | |||
| Location | |||
| North of Solitude Southeast of Broken Oar Grotto |
|||

Brinewater Grotto is a small cave north of Solitude containing horkers or bandits. It contains only one zone, Brinewater Grotto.
Before the quest Scoundrel's Folly, it is simply a small cave that is home to three horkers, with the rest of the grotto inaccessible. During the quest, it will be occupied by bandits.
Related Quests[edit]
- Scoundrel's Folly: Squeeze a reluctant informer for information.
Walkthrough[edit]
Exterior[edit]
Brinewater Grotto is on the coast near the path that leads to Solitude Lighthouse. As you approach the lighthouse, the path splits, with a branch to the northwest leading past a small jetty with a rowboat moored to it. At the end of the branching path is a lantern hanging from a post. There is an unlocked wooden chest beside a barrel in a corner of the rock face to the left. On the barrel is an iron dagger and two loose septims. The entrance is just to the left of the barrel and chest.
Brinewater Grotto[edit]
There is quite a bit of vegetation throughout the cave; however, none of it is harvestable. The main floor is shallowly flooded, with several rock pillars supporting the roof, and a ledge around most of the cave. There is a concealed stone door in the western wall when entering the cave near the lighthouse, but you cannot open the door from this side; it will serve as your exit at the end of the related quest (see notes). The ledge in this small area can be reached by jumping from a rock to the left of this door, although there is nothing of interest on the ledge. During the related quest, you will enter the cave from the East Empire Company Warehouse.
Entering through the East Empire Company Warehouse leads into a tunnel with a tripwire a short distance along that triggers a swinging mace trap. Ahead you will hear two bandits talking; they are standing on a jetty behind shelves stacked with crates stamped with the East Empire Company logo. There is a bear trap on the ground at the exit of the tunnel. The cave seems to be long and narrow, with the left half a deep stream allowing small rowboats to navigate; hence the jetty. Among the crates on the shelves are nine bottles of alto wine, two bottles of Nord mead, seven bottles of wine, a silver ingot, five iron ingots, two random potions of healing, two random potions of strength, and a random potion of stamina.
At the end of the shelves is a narrow flight of wooden stairs next to an opening blocked by thick cobwebs that you can cut or burn through. Behind the cobwebs is a short tunnel leading to more thick cobwebs; a small cave beyond the second set of cobwebs contains three frostbite spiders. On the other side of the small cave is another tunnel past two more sets of thick cobwebs that opens on a ledge back in the main area, serving as a shortcut through a section of the main area.
Return to the stairs and climb them to a wooden platform, lit by widely spaced torches that can be taken to darken the cave and help conceal you. Ahead you can see two bandits; one is a magic user. Just past the bandits, under the water to the left is an unlocked chest containing minor loot. There are wooden steps leading down into the water that you can use to regain the path. On your right is the ledge where the spider cave exits, with stairs leading down from the ledge. Ahead is a wooden bridge crossing to the other side of the water, and on the far side is a bandit archer. A short distance farther along is an opening on your left leading into a brightly lit area, with a tripwire partway along that triggers another swinging mace, and another tripwire and mace at the far end. Between the two tripwires are two bear traps hidden among vegetation. Just past the second tripwire is a dog that you can hear barking, and possibly a dead skeever. There are bone chimes hanging from the ceiling near the dog, and a piece of horker meat on the ground in a wooden bowl. The tunnel emerges back into the main area opposite a campfire, with several food barrels all around and two bandits standing by the fire.
Staying in the main area instead of turning left and entering the side tunnel, the path winds around a corner before recrossing the water to the right-hand side, leading to a platform and stairs down. On your left are more stairs that lead down into the water, with another bear trap at the top. Around another corner is the campfire and crossing near the exit from the side tunnel, accessed on the left over an earthen bridge. There are several food barrels and an adept-locked chest by the fire, and two metal pots each containing two seared slaughterfish steaks hanging over the fire. There is a rock pillar between the fire and the stream, and a pressure plate behind the pillar that triggers a battering ram to stop anyone trying to sneak past the guards from the side tunnel. Ahead is another wooden bridge crossing the water, with bone chimes hanging under it to catch anyone trying to sneak through the water. The bridge crosses to a small ledge, with bone chimes hanging from the ceiling by another bridge that crosses back to the final area. Beyond the second bridge are two rowboats moored to another small jetty, with a bandit standing nearby and another patrolling the area. The rowboats each hold a chest, one apprentice-locked, and the other unlocked. Under the water throughout the length of the cave are many clusters of slaughterfish eggs, although there are no slaughterfish.
To the east is a large area with shelves stacked on either side, another campfire in the middle, and several large cages along the back wall. Gulum-Ei and yet another bandit are standing by the fire. Just before the fire, by a rock pillar on the left, is a long wooden table with benches on either side. There are two bowls of horker stew, a seared slaughterfish steak, a slaughterfish egg, and some slaughterfish scales on the table. Opposite the table are some wide wooden stairs leading up and behind the shelves on the right to a ledge, where four unowned bedrolls and a barrel with an eidar cheese wedge on top are found. There is a random cuirass on one of the shelves that can only be reached from this ledge. Dropping off the western edge of the ledge leads you to a smaller ledge, with two small coin purses on the ground.
From the ground, the right-hand shelves hold three chests: one is on the ground and is unlocked, and the next with an expert lock is on the first shelf, along with a leveled enchanted dagger, a random helmet, and a random cuirass. There is an angled ladder you can climb to retrieve an empty random soul gem and a Dibella statue from the second shelf; the third chest is also unlocked, and is on the third shelf with a Markarth guard's shield and a Solitude guard's shield. The shelves on the left hold two more chests, one master-locked, the other expert-locked. Also on these shelves is a random shield, six common books in an open crate, two random swords, a random war axe, and copies of some rarer books: Hanging Gardens, 2920, Evening Star, v12, Wraith's Wedding Dowry, and Children of the Sky. To the east are three levers that open two large cages as well as a concealed door between them. Nearby is a crate with three fillets of horker meat and three horker tusks on top, and a bucket containing two salmon beside it. The cages contain a total of five more salmon. The concealed door opens to reveal the small section of the cave that can be accessed from the entrance near the lighthouse.
Notes[edit]
- The bandits don't respawn and the concealed exit doesn't reset to the closed position, allowing you to enter the cave near Solitude Lighthouse and easily loot the entire cave once the items found inside the cave have respawned.
- The related quest won't advance if you enter the cave near the lighthouse. Enter instead from the East Empire Company Warehouse.
- If you enter the cave near the lighthouse, you can glitch through the concealed stone door by holding a wooden plate against it then running against the plate or using the Whirlwind Sprint shout until you clip through the door; you may then activate the middle lever beyond the wooden gate to open the door. The loot will be intact, but the bandits that occupy the cave during the related quest won't be present, making the three frostbite spiders and the dog the only enemies in the entire cave.
- If you glitch through the stone door, don't approach the door to the East Empire Company Warehouse too closely, as it will be key-locked (and unpickable) and getting too close will start a broken version of the related quest: there will be no quest description, and since Gulum-Ei won't be present anywhere, the game will direct you to The Ragged Flagon - Cistern, which isn't accessible unless you join the Thieves Guild. To exit the cave, you will need to return to the entrance near the lighthouse.
Bugs[edit]
- The swinging maces may already be hanging down, even though the tripwires are still intact.
- You may only be able to manually open and close one of the metal cage doors after activating the corresponding lever. ?
Maps[edit]
-
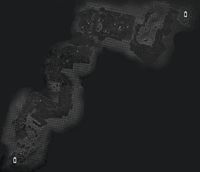
Brinewater Grotto
