User:MolagBallet/Sandbox 14
Good evening and welcome to this under construction guide on taking wiki-ready screenshots of cosmetics in ESO! If you've browsed out Collections pages at all, you may have come across my work. Some of these shots, especially for Head Markings, Adornments and Hair Styles, appear remarkably clear and close to their subjects. If you're interested in taking screenshots of characters or helping out on our Collections pages, this page can help!
First thing's first: if you want to take a screenshot, you should turn off your UI. This can be bound to any key you choose under "User Interface" in Controls in the options menu (pressing Escape on PC).
Contents
Useful Tools[edit]
First thing's first, I need to talk about addons. Screenshot Helper is in play when I take pretty much any screenshot. It removes 90% of all ui elements from the screen which simply turning off the UI doesn't. For example: quest markers. If you haven't already disabled health bars/nameplates and the glow that occurs when an NPC can be looted or you hover your cursor over a live NPC, Screenshot Helper gets rid of that, too. Screenshot Helper's "get rid of the UI" features occur when you use the keybind to remove the UI, so don't worry about these elements going away when you don't want them to, and remember to bind a key to hide the UI if you want to use this addon.
How to Use Screenshot Helper[edit]
The most basic use for Screenshot Helper is to install it and press the key to hide the UI. UI On/Off is bound to 9 on my keyboard, so if I want to take a screenshot, I press 9, aim, and then press backward slash, which is my keybind for taking screenshots.
However, there is the curious case of head marking screenshots.
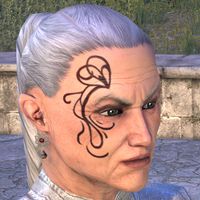
Head markings

These are taken in Crown Store previews. If you want to preview a marking you own, put it on and preview a minor adornment in the Crown Store, such as an earring (I prefer to preview hairstyles that don't get in the way of a character's face and unobtrusive earrings from the Cosmetic Packs). This zooms the camera in on your face and allows you to zoom even further with Screenshot Helper. You can zoom in and out when your UI is off using Page Up and Page Down on your keyboard (with Screenshot Helper installed). When you preview something in the Crown Store, the preview only takes you so close to your character's head, which is why Screenshot Helper is useful.
Crown Store UI[edit]
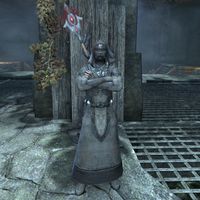
I want to mention something special about the Crown Store UI for just a second. When you enter most menus, there's a blur effect behind all the UI elements which obscures things that are in it, even when the UI is off. If you want to take a screenshot of your character transformed into, say, Ostarand from the Fighters Guild questline, the edges of the image will be blurry if you take it in most menus. The Crown Store menu doesn't have that blur, so images of your character modeling a costume, polymorph, etc will all be clear and blur-free if you enter the Crown Store menu and turn off your UI.
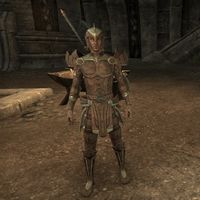
An image taken in the Crown Store with the UI turned off

Angles[edit]
I try to get screenshots at an angle. Shooting something straight-on is fine, but NPCs look more attractive when you're at an angle just below them. The same rule typically applies to pets that are being photographed in houses.
(example of a head-on shot) (example of a shot taken without crouching, camera above NPC's face) (shot taken while crouching, character's eyes below NPC's face.)
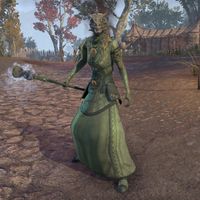
This shot was taken a short ways away from the NPC while crouching, with the camera zoomed in using Photographer / Screenshot Helper
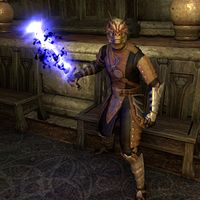
A shot taken during combat without crouching
A shot taken during respawn, standing up a short ways away, with the camera zoomed in using Photographer / Screenshot Helper

.jpg)

Standing a short ways back, crouching, and using screenshot helper to change the FOV while your UI is off is a nifty way to get good shots of the NPC that are 1) angled well, and 2) close enough that the NPC takes up a good amount of space in the shot as a whole.
Taking Fully Upgraded Mount Images Without A Crown Store Preview[edit]
Why do this: I do this for mounts that I own, but aren't currently in the Crown Store. I take mounted screenshots for consistency. Replacing a well-lit mounted image with a worse image of a mount that's standing in a house is not necessarily ideal. Having no rider in the picture does not make a picture better.
What you'll need: You want to do this in broad daylight. Don't feel pressured to try and hide the rider; the particle effects from the Kollopi Essence disguise will merely get in the way of the mount's detailing.
- Equip the mount you want to photograph and start riding it.
- Open a menu (such as your inventory) that allows you to spin your character using your mouse cursor while you're on the mount.
- Open the chat and type in the following command and hit enter:
/script SetFullscreenEffect(FULLSCREEN_EFFECT_NONE). This will hide the blur effects that pop up on the edge of your peripheral when you open a menu for as long as that menu is open. If you close the menu and reopen it, you'll need to hit Enter to activate chat, then press the Upwards-pointing arrow key to copy the command you previously sent, then hit Enter to effectively use the command again. - Once the blur effects are hidden, turn your character so they're facing the side (ideally with the front of the mount facing the right side of your screen, or angled diagonally towards the viewer. This allows the camera to see the most of the mount).
- Once you have a good, full view of the mount, take the shot.
Examples of mounts that were shot with this method:
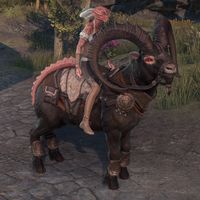
Great Dark Ram
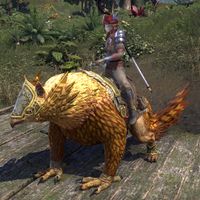
Aurielic Quasigriff
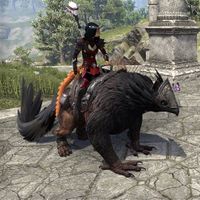
Dagonic Quasigriff
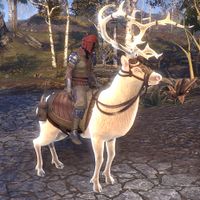
Palefrost Elk
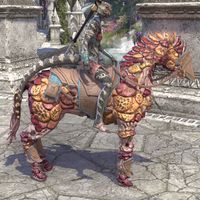
Sadrith Mora Spore Steed


