Skyrim:Forgotten Seasons (quest)
| This page is currently being rewritten as part of the Skyrim Quest Redesign Project. The page is being rewritten and checked in several stages. All users are welcome to make changes to the page. If you make a change that is relevant to the project, please update this template accordingly, and make sure you have observed the project guidelines. |
|
Quick Walkthrough[edit]
- Enter Runoff Caverns and navigate your way to the entrance to Vardnknd.
- Read Elberon's Journal in Vardnknd Gallery.
- Enter Autumn's Bells and place enough wheat in the depositories to access the Conduit Control Gem.
- Enter Spring's Symphony and kill the Blooming Spriggans to open your path to the Conduit Control Gem.
- Enter Summer's Chords and use the Spider Control Rod to direct a Repair Spider to every service waypoint.
- Enter Winter's Chimes to locate and retrieve the Conduit Control Gem.
- Once all four Conduits have been deactivated, return to Vardnknd Gallery to fight off the remaining mercenaries and open the way to Vardnknd Skykiller Gallery.
- Defeat the Sky Orchestrator and claim Turn of the Seasons to gain new passive perks.
Detailed Walkthrough[edit]
A Lost Ruin[edit]
This quest will be added to your journal upon installing the Forgotten Seasons Creation. You will be directed to Runoff Caverns, an undiscovered cave far south of Rorikstead which will already be marked on your map. The cave has an unassuming entrance located just west of Lost Valley Redoubt; you will know you have arrived once you see the torso of a broken Dwarven Horse. Activating this strange relic will begin a separate quest called The Dwarven Horse to reassemble the construct, which can be done in tandem with this quest.
Head inside the dungeon and you will quickly notice that these natural caverns actually contain a large Dwarven ruin. You will soon come to a massive central chamber where a group of deceased mercenaries had set up camp. A note in one of the tents will provide some context for this failed expedition; the dead mercs were hired by a mage who headed deeper into the ruins, leaving them to guard the entrance. Clearly they were overwhelmed by the Dwarven spiders patrolling the cavern, and the drawbridge spanning the chasm has unfortunately been raised, blocking your progress. Your only option is to descend to the floor of the cavern, fighting your way through hostile automatons until you come to a side passage. This path will eventually lead you up and around to the other side of the cavern, where you will begin to encounter hostile mercenaries who are still very much alive.
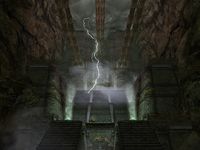
Before you continue on deeper into the ruins, it is advisable to drop the lever lowering the drawbridge, allowing for easy access back to the entrance camp without having to trudge back through the side passages each time. With this done, continue on until you come to the entrance of Vardnknd. You will likely hear this entrance before you see it, as it is surrounded by stormclouds and lightning strikes. The lightning will hit you if you tarry, so move swiftly onward.
A Mage on a Mission[edit]
Once you've entered the ruins proper, you will find yourself in Vardnknd Gallery, a central hub area for the dungeon. You will be greeted by a scene of chaos, as lightning strikes and hostile mercenaries fill the entire chamber. You will play witness to the death of the mage Elberon by one such lightning strike. He is the leader of this expedition, and as his journal reveals he has entered the ruins in an attempt to shut down the Weather Witch contained within. These rare devices have the ability to control the weather, and this particular one threatens to throw the entirety of Skyrim into chaos due to malfunction. Deal with the hostile mercenaries, then locate and read his journal to progress the quest. You will also be directed to loot Elberon's body as part of another separate quest called The Dwarven Crown, which again can be done concurrently with this one.
The journal also advises you to read Elberon's account of his previous expedition to the ruins, titled Forgotten Seasons, v1. A copy can be found on his desk and provides a guide on how to navigate the rest of the dungeon, and you will need to read same to progress the quest. In short, you will need to recover three Vardnknd Conduit Gems from separate sections of the ruins in order to turn off the Weather Witch and face the final boss. These can be recovered in any order you like, as the entrance to all four areas are located in Vardnknd Gallery.
Autumn Harvest[edit]
The Autumn's Bells section of the dungeon consists of what looks to be an underground farm, tended by dangerous Dwarven automatons. Travel down the entrance hallway (which will eventually open out into the agricultural fields) until you find a dead mercenary carrying a Note on Autumn explaining how to reach the gem in this section. The objective here is to harvest strange magical wheat that grows in the fields all across the chamber, and place one of each type in six corresponding depository containers to unlock the treasure room containing the gem. You only need to harvest at least one sample of each of the six types of wheat (Blue Luminous, Glowing Red, Off-Color, Orange-Encrusted, Sickly Green, and White Molded), and you can harvest an infinite amount of weightless wheat from a single plant. Once you have deposited wheat in all the containers, the treasure room will open and you will be free to disable this section's conduit gem.
If you are doing the other two quests, Autumn's Bells also contains all the necessary parts to repair the Dwarven horse, as well as one of the masks needed for the Crown quest.
Spriggan Hunting[edit]
The Spring's Symphony section of the dungeon is filled with spriggans and animals, always a dangerous combination due to spriggans' ability to turn normally passive animals hostile. This part of the ruins is a basic dungeon crawl, although impassable vines will be blocking your way forward. You will again need to locate the body of a dead mercenary to read the Note on Spring, which explains that you need to kill the Blooming Spriggans specifically in order to get past the vines. Certain corridors are also filled with a green miasma which causes poison damage. You will eventually be confronted by a boss-level Blooming Spriggan Matron carrying the key needed to reach the gem in this location.
Other treasures of note include another mask for the Crown quest and a tiny Dwarven Drone Fly.
The Mask of Spring is at the end of the hallway through the door near the beginning of the Spring's Symphony section. It requires a key, which means you'll have to reenter this section after completing it.
The Dwarven Drone Fly is near the end of the dungeon beside a chest and a chair, shortly before the drop to disable the conduit. The fly can be picked up and used as a companion. It will only follow you for short intervals at a time, but while active it will grant you poison resistance and increased stamina, which can be useful for navigating the sections of this zone containing toxic green gas.
Shall I compare thee?[edit]
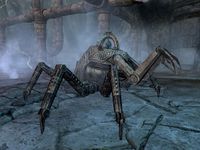
The Summer's Chords section of the dungeon is entirely flooded with lava, requiring you to walk along piping and narrow bridges so as not to fall to your doom. Just inside the entrance, a mercenary who carries the Note on Summer lies dead next to a Spider Control Rod and a lever. Pulling the lever will spawn a non-hostile, friendly Repair Spider. As explained by the note, in order to disable the conduit here, you need to direct the repair spider to several "service waypoints" throughout the section. These are small metal pads which glow yellow when activated by the spider. In order to move the spider, you will need to take and equip the nearby Spider Control Rod, which functions identically to a similar rod found in Calcelmo's Laboratory: aim it at where you want the spider to go. Unfortunately, your way is impeded by several flame atronachs who can attack the spider, as well as traps which can also kill the spider if you aren't careful about its positioning. If the spider dies for any reason, go back to the entrance and use the switch to spawn another one. Once all the waypoints are activated, the conduit shuts down; there is no conduit gem to obtain here, nor any hidden loot.
Note: In the first hallway to the right after obtaining the spider there is a locked chest, in the hallway to the left with a small downward ramp, repair spider may get "stuck"; in order to move on, kill the repair spider and return to get a new one. There is also a chest behind the last waypoint.
Diving Lessons[edit]
The Winter's Chimes section initially appears to be a snowy exterior area. You will walk in to a scene of gore as the bodies of dead mercenaries fall from above, having been slaughtered by the icy inhabitants of this area. The first of these mercenaries lies dead at the threshold between the entryway and the first of many vertical chambers in this section, which is climbed with a spiraling ramp; the mercentary carries the Note on Winter, and two waterbreathing potions lie beside him. Make your way up the ramp and face off against the Frosted Dwarven Spiders, which use frost attacks rather than the usual lightning. As you ascend, you will soon realize that this section is actually one large chamber caught in an eternal artificial blizzard. The remainder of this section continues to be just as vertical as the starting area, requiring you to leap into half-frozen pools of water before ascending again. In addition to the spiders, beware Frost Atronachs and Ice Wraiths as you navigate the level. Once you reach the summit, you can grab the conduit gem and leave.
The real challenge from this level is designed around the Cold mechanic in the Survival Mode Creation, which is affected by icy water and exposure to the elements. Followers cannot accompany you here, forcing you to deal with any enemies using your own skills or conjured helpers. This section also contains a mask for the Crown quest, well-hidden and guarded by a powerful Frosted Dwarven Centurion.
Face the Sky Orchestrator[edit]
Once you have deactivated all four conduits, you will return to the Vardnknd Gallery hub area only to find it once again occupied by hostile mercenaries. Beware, as they spawn alongside Elberon's Apprentice, a very angry mage seeking to avenge his master's death. Once you've dealt with the competition, you will have to approach the west side of the Gallery, towards a door located on a ledge above. As you get nearer, stairs will rise to give you access to the door above (see bugs). This leads to Vardnknd Skykiller Gallery, a chamber containing the final boss: the Sky Orchestrator, a giant dwarven spider.
The Sky Orchestrator can be a challenging fight and possesses several stages. Initially the Orchestrator will enter frost mode and deal AoE frost damage. This will then switch to fire mode, at which point the Orchestrator will be doing fire damage and summoning Enraged Spriggans. Finally, it will enter lightning mode and deal significant shock damage until it is destroyed. Loot its remains for the Ward of the Seasons, a unique Dwarven cuirass.
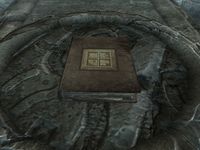
With the final boss destroyed, you will be rewarded at long last with Turn of the Seasons, a book which you can consume to obtain a new Power. This constant-effect ability grants the following buffs, depending on the weather:
- Fortify Barter, 10pts when it rains
- Regenerate Stamina, 5% if you are wearing a full Light Armor set in clear or sunny weather
- 10% more critical damage with Bows when overcast
- Armor, 10pts if you are wearing a full Heavy Armor set when it is snowing
Using the lift in Skykiller Gallery will bring you right back to the entrance of Runoff Caverns, allowing for a swift exit. Congratulations!
Notes[edit]
- There are a few of the rare Yellow Mountain Flowers outside the entrance to the Spring's Symphony zone.
Bugs[edit]
- The stairs leading to Vardnknd Skykiller Gallery may not rise visually, but you will still be able to ascend them once you've cleared all four of the seasonal zones.
- The Dwarven Crown may not be on Elberon's corpse. ?
- If you turn off the conduit before starting the quest, it will not count and you will not be able to do it again.
- Don't do any of the spring, winter, autumn or summer areas before you have activated the quest.
- The Vardnknd Spring Key may not be on the Spriggan Matron's corpse. ?
- It seems to be intended for the green gases in the spring area to poison you and that the Dwarven Drone Fly was designed to combat this, but the gas is entirely aesthetic. ?
The game may crash numerous times throughout the dungeon when playing the Switch version.
Quest Stages[edit]
| Forgotten Seasons (DLCDwarvenPuzzleDungeonQuest01) | ||
|---|---|---|
| Stage | Finishes Quest | Journal Entry |
| 0 | I've heard tales of a lost Dwarven ruin southwest of Markarth. While such ruins are not uncommon in Skyrim, this one was rumored to let one control the sky itself. If my travels take me south of Rorikstead, I should keep an eye out for anything that might resemble an entrance.
Objective 0: Find the entrance to the Dwarven ruin
|
|
| 1 | I've discovered a strange Dwemer ruin, where a mercenary party has been attacked by hostile machines. I should investigate.
Objective 1: Investigate the ruin
|
|
| 2 | It seems a mage had set up camp in the heart of the ruins. Unfortunately, he was struck by lightning before I could reach him. Maybe I can find out more about these ruins by inspecting his remains.
Objective 2: Investigate the mage's camp
|
|
| 3 | According to the mage's journal, Vardnknd contains a device capable of controlling the weather. However, without a steward to manage it, the storm has increased in size and threatens to affect weather outside of the ruins. Left unchecked, it could spread to the rest of Skyrim. It seems the only way to shut down the system is to disable four separate conduits in sub-facilities throughout the ruins.
Objective 4: Disable the Conduit of Spring
Objective 5: Disable the Conduit of Summer
Objective 6: Disable the Conduit of Winter
Objective 7: Disable the Conduit of Autumn
|
|
| 4 | With all the conduits deactivated, I should be able to proceed and shut down the source of this inclement weather.
Objective 3: Shut down the Weather Witch
|
|
| 5 | I defeated the Sky Orchestrator. The violent weather seems to have ceased as a result. | |
| 6 | At the center of the ruin I have encountered an enormous Dwarven machine. As the weather seems to obey it, perhaps destroying it will stop the storm.
Objective 12: Defeat the Sky Orchestrator
|
|
| 7 | To reach the Conduit of Autumn, I need to open a massive door. The door seems connected somehow to the pipes and depositories nearby.
Objective 11: Gather the different types of wheat and place them in the depositories
|
|
| 8 | The path to the Conduit of Spring is blocked by thick roots. I'll need to find a way to move them aside.
Objective 9: Kill the spriggans that control the obstructing roots
|
|
| 9 | The Conduit of Summer appears to be powered by heat. In order to disable it, I'll need to activate service waypoints that supply coolant to the facility. However, with the pathways blocked, I'll first need to use a control rod to direct a repair spider to the waypoints.
Objective 10: Use the control rod to direct the spider to the service waypoints
|
|
| 10 | The facility that studied winter has been ravaged by a permanent blizzard. I should be able to navigate through each icy water reservoir to reach the Conduit of Winter.
Objective 13: Find a way through the icy reservoirs to reach the Conduit of Winter
|
|
| 11 | I discovered a journal on the mage's body. I should inspect it to learn more about what lies ahead in these strange ruins.
Objective 14: Read the mage's journal
Objective 8: Find and read the mage's notes on each facility
|
|
- Any text displayed in angle brackets (e.g.,
<Alias=LocationHold>) is dynamically set by the Radiant Quest system, and will be filled in with the appropriate word(s) when seen in game. - Not all Journal Entries may appear in your journal; which entries appear and which entries do not depends on the manner in which the quest is done.
- Stages are not always in order of progress. This is usually the case with quests that have multiple possible outcomes or quests where certain tasks may be done in any order. Some stages may therefore repeat objectives seen in other stages.
- If an entry is marked as "Finishes Quest" it means the quest disappears from the Active Quest list, but you may still receive new entries for that quest.
- On the PC, it is possible to use the console to advance through the quest by entering
setstage DLCDwarvenPuzzleDungeonQuest01 stage, wherestageis the number of the stage you wish to complete. It is not possible to un-complete (i.e. go back) quest stages, but it is possible to clear all stages of the quest usingresetquest DLCDwarvenPuzzleDungeonQuest01.


