Skyrim:Geirmund's Hall
|
|||
|---|---|---|---|
| # of Zones | 1 | ||
| Clearable | Yes | ||
| Dungeon | Yes | ||
| Respawn Time | Never (storage is safe) | ||
| Level | Min: 6 | ||
| Occupants | |||
| Draugr, Frostbite Spiders, Skeevers, Sigdis Gauldurson | |||
| Important Treasure | |||
| Gauldur Amulet Fragment Gauldur Blackbow Words and Philosophy |
|||
| Console Location Code(s) | |||
| GeirmundsHallExterior, GeirmundsHall01 | |||
| Region | |||
| The Rift | |||
| Location | |||
| East of Ivarstead West-southwest of Nilheim |
|||
| Special Features | |||
| # of Arcane Enchanters | 1 | ||
| # of Fishing SuppliesCC | 1 | ||
| Ore Veins | |||
| # of Iron | 1 | ||
Geirmund's Hall is a small Nordic ruin east of Ivarstead containing draugr, frostbite spiders, skeevers, and the draugr Sigdis Gauldurson. It contains only one zone, Geirmund's Hall.
Related Quests[edit]
- Forbidden Legend: Investigate the forgotten Gauldur Legend.
- Caught in the RainCC: Catch rainy weather fish.
- This location is one of many potential targets for one or more of the Radiant quests.
Walkthrough[edit]
Exterior[edit]
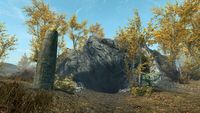
The ruin is on an island in the middle of Lake Geir. Several blue and red mountain flowers, two canis root plants, a thistle, a dragon's tongue, and gourds grow on the island. Several upright stones and three patches of bleeding crown fungus are in front and on either side of the entrance. Two iron ore veins are just east of the entrance, and one corundum ore vein is a short distance to the northwest. Near some rocks to the north are two patches of imp stool fungus.
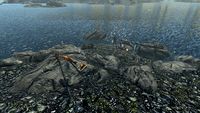
With the Fishing Creation installed, some Fishing Supplies can be found to the northeast, along with a fishing rod, drying salmon and brook bass, two cooked brook bass, cooked carp, a knapsack, a bottle of ale, and copies of Line and Lure and Horker Attacks. Fish from temperate lakes can be caught here.
Geirmund's Hall[edit]
Upon entering, there are many fungi growing in the cave, including fourteen bleeding crown, nineteen fly amanita, and five white cap. Two skeevers will attack as you descend toward a large sinkhole. To the west of the hole is a dead adventurer who is carrying a copy of Lost Legends, which will start the quest Forbidden Legend if you haven't already started it. The only other item of interest is an iron ore vein on your left as you descend.
Jump down through the hole into the pool below. Under the pool you will find an urn and a short dead-end passage containing a burial urn, and at the end, an unlocked chest, a random sword, a medium coin purse, a random potion of waterbreathing, and a random empty soul gem on the sandy bottom. Be careful to make sure your follower does not come with you, because you may be unable to leave the water-filled passage and drown when they block your exit. There is an iron door to the west, with wooden stairs leading up to it out of the water. Opposite, among some rubble, is a burial urn and a large coin purse.
Spiderweb Hall[edit]
Through the door you will face two frostbite spiders in a web-filled room, with an adept-locked door to the north and a passage to the south. Behind the door is a short passage with a broken table on your right holding a random set of armor, a random shield, and a random potion of healing.
Flooded Catacombs[edit]
At the start of the passage to the south is an adept-trapped chest on a dresser, and next to this is a pressure plate that triggers a poison dart trap from the walls ahead. Continuing to the west down a flight of stairs into some shallowly flooded catacombs with rotating pillars, look at the symbols on the walls.
The order is Eagle—Whale—Snake—Whale. There are pillars for each symbol in this area guarded by one draugr each, at least one of which is a magic-user. Halfway through the pillar section, there is a table with a random filled soul gem on a weight sensitive plate, which will set off a battering ram in the form of a mammoth head and tusks swinging down from the ceiling. You can set the trap off safely if you are beside or on top of the table when you take the soul gem. There is also a random potion on the table. There is a burial urn by the first rotating pillar, another burial urn (partially buried) farther along the wall on the same side, and diagonally opposite a large urn by the table. At the bottom of the stairs is the first pillar (Eagle). Turning right, the second pillar (Whale) is next to the stairs. The third pillar (Snake) is behind the table. Going slightly backwards, then left, you can see the fourth pillar (Whale). Then turn to the right and pull the lever so you can go through the door to the north.
Lord Geirmund's Tomb[edit]
A short tunnel with several more fungi growing along it leads to an area where you will encounter three more draugr: one at the bottom of the ramp, and two more guarding the corpse of Geirmund at the top. Care should be taken, as fighting these three can alert another leveled archer draugr on a walkway above the room. There is a well-hidden large coin purse in the second shelf of the fallen bookshelf at the base of the ramp; only the very top of it shows through the sand. A second hidden large coin purse is among some rubble to the southwest. To the west is a sideboard with a random bow and a single arrow on top. To the right is a set of shelves holding leather strips and a random potion of stamina.
Before approaching Geirmund for the key, you can use a Whirlwind Sprint shout or skillful jumping to reach the broken bridge on the west side of the room, leading to a leveled treasure chest. Be careful when opening the door, as it is rigged: there is a spellcaster trap that shoots firebolts at you directly behind it. Remove the soul gem to disarm the trap. You can stand to the side to avoid the blast, or disarm the tension cable first. The chest itself is not trapped, but does have an expert-level lock.
Proceed to take the key from Geirmund's skeleton (the key is visible in his hand, but it's not in his inventory). You can grab the epitaph for some content reference if you want, and Geirmund has some pretty good loot for the taking. To the east of Geirmund is an urn, with an unlit brazier in front containing a random mace. The key will open the door directly behind Geirmund's resting place, or you can pick the adept lock.
Crafty Passage[edit]
As soon as it opens, a draugr may or may not spawn at the arcane enchanter table, and there is a large frostbite spider or skeever to the left. Up the stairs to the right, there is a random potion of invisibility and an urn. On the table with the enchanter is a random battleaxe and a random poison, while near the table on the ground is a random empty soul gem. Once you've dispatched the frostbite spider or skeever, proceed to the west past two bookcases, the second of which has a random helmet on top. At the bottom of the stairs on the ground to the right is a small coin purse. Proceed up the stairs, where another leveled draugr will be patrolling. There is another sideboard on the left, with a potion, a random pair of boots, and a random bow on top.
Once you reach the drawbridge, you'll be facing the raised bridge (with another draugr behind it, if you didn't deal with it from below) and a lever. There will be spear holes in the wall pointed in your direction; the said lever is a dummy that activates this spear trap. Instead of that lever, if you are facing the bridge, the lever that will actually lower the bridge is directly behind you, hidden in the corner. (If you did not Whirlwind Sprint or jump up to the hidden treasure chest from before, you can now simply drop off the right side of this bridge to reach it, then backtrack here once you've gotten the treasure.)
Kill the draugr here, and cross the bridge to the center pillar. Here lies another lever that will drop the other side of the bridge. Two more draugr are roaming around the far side of this walkway. You can easily shoot and kill them before dropping the bridge. However, when they die, they may land on the pressure plate behind them, setting off the swinging axes in the hallway. You will find one more draugr, a magic-user, just past the pressure plate, around the corner at the end of that hallway. The chain to deactivate the axe trap is found here on the wall. After you descend the following stairs, you will pass another sideboard with a random poison on top. Around the corner, the passage ends on a ledge.
Sigdis Gauldurson's Tomb[edit]
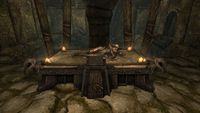
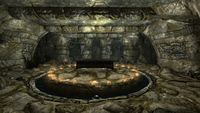
This next area is where you'll confront the boss, Sigdis Gauldurson. The area below the ledge where you will fight the boss is full of many more of the fungi already found throughout the ruin, while many hanging moss also grow in this area. Once you drop down here and head toward the quest objective, Sigdis Gauldurson will burst out of his sarcophagus. Don't waste arrows/magic/shouts while he is rising, as they will not harm him, and may trigger a bug (see bugs).
Boss Strategy[edit]
Sigdis will conjure two illusions of himself and teleport to one of four spots in the room. The illusions will die in one hit, so find the real one and defeat him. There are several strategies to do this:
- The illusions glow with a faint blue aura, while Sigdis himself does not; Sigdis also wears a helm with horns curling downward (similar to an Ancient Nord helmet), while the illusions have helms with horns pointing upward or no horns. Equip your bow and arrow, crouch behind his tomb for cover, and aim for the one without the glowing blue aura and with the telltale helm. If you destroy the two illusions, Sigdis will teleport and create them again.
- If you approach Sigdis, he will generally try to deal one more hit of damage before teleporting and summoning new illusions. This rapid room-crossing can be tricky to overcome for melee-dependent classes. For melee players, a crushing shield bash will stagger him long enough to land an overpowered hit or two quick follow-up hits before he teleports away; attacking Sigdis directly with a melee weapon may cause it to be disarmed. Otherwise, summoning magic and ranged spells may prove useful. For example, Bane of the Undead will both damage Sigdis and eliminate the illusions.
- Return to the ledge from which you entered the cavern. It's then easy to pick off Sigdis, and he doesn't seem to shoot back, although he still teleports himself and his two minions around the room.
- While Sigdis is teleporting, put a rune on one of the spots where he appears, then quickly turn to aim at another spot. When he finishes teleporting, either you will have hit him, or you've eliminated an illusion. If the latter, quickly fire again at another spot, and you can potentially eliminate two of the three possible versions of him.
- Once you've hit the real Sigdis, his damaged health bar will start to show when your sight hovers over him, while the illusions will never show a damaged health bar, as they dissipate when damaged. This is an easy way to tell where Sigdis is when he teleports.
Once Sigdis is defeated, loot his corpse for the Gauldur Blackbow, a Writ of Sealing, and a Gauldur Amulet Fragment (a quest item for Forbidden Legend). You'll find an escape tunnel behind his sarcophagus leading to a treasure room, featuring a boss-level unlocked chest with a plate holding two pearls and a small pearl. To the right is a set of shelves holding a random helmet, gauntlets, and shield, a soul gem, a random potion of magic, and a copy of the Two-handed skill book Words and Philosophy. To the south, a passage leads to a lever that will open a hidden door back to the first room.
Notes[edit]
- Tell any followers to wait outside the cavern or on the tomb side of the boss room, out of harm's way. Do not leave them on the islands in the middle of the water, as they may die or kill Sigdis' clones, making your task harder.
- If the key is not on the altar, look on the floor, as the draugr above on the landing may attack you with shouts and knock it off.
- Sigdis' clones have petty souls. You can farm the respawning clones using a bow with a soul trap enchantment and a decent Sneak skill until your soul gems are all filled. However, the only way to leave the ruin is through the secret door that opens when you kill Sigdis, so you can only exploit this mechanism for a single session.
- Sigdis' clones can be used to easily gain Vampire Lord perks.
- Geirmund's Hall also appears in ESO.
Bugs[edit]
- Save before falling down the hole. Sometimes the pillars won't turn when activated. Reloading may resolve this.
- There's a repeating clanking sound coming from the wall in the upper parts of the stairs up to the hallway with the drawbridge lever, and in parts of the hallway itself. The source of the sound is at the top of the stairs, after the room with the arcane enchanter, caused by a potion partially stuck in the wall continuously spawning and falling every few seconds. It can't be picked up.
- Followers caught in the pendulum trap room sometimes disappear for good. ?
- If you get a kill move on Sigdis and he teleports while in the middle of the move, his body may disappear, making it impossible to complete the quest.
- Do not attempt to use Unrelenting Force against Sigdis while he is emerging from his coffin. He will glitch, and you will be unable to kill him. ?
- If you do glitch him by starting with Unrelenting Force, you may be able to "fix" him by using the shout again on the "dead body" while fighting him. One of the three spawns during the fight will almost always be a dead body.
- If you are knocked down by Sigdis' Unrelenting Force shout, you may get stuck behind the wooden bars at the southeastern end of the water area. ?
- If you knock Sigdis down with your Unrelenting Force shout before but not during his teleporting state, his AI may break and he will not attack for the rest of the fight. ?
- If you kill Sigdis before he teleports, the exit may not open, and you will be trapped.
- If you paralyze Sigdis before he disappears, he will glitch and be unkillable.
- You may be unable to loot Sigdis if he has been disintegrated. ?
- Skyrim-Places-Nordic Ruins
- Skyrim-Places
- Skyrim-Places-Level 6
- Skyrim-Places-The Rift
- Skyrim-Places-Iron Veins
- Skyrim-Places-Arcane Enchanters
- Skyrim-Places-Fishing Supplies
- Skyrim-Places-Clearable
- Skyrim-Places-Safe
- Skyrim-Places-Discoverable
- Skyrim-Places-Draugr Crypts
- Skyrim-Confirmed Bugs
- Skyrim-Unconfirmed Bugs


